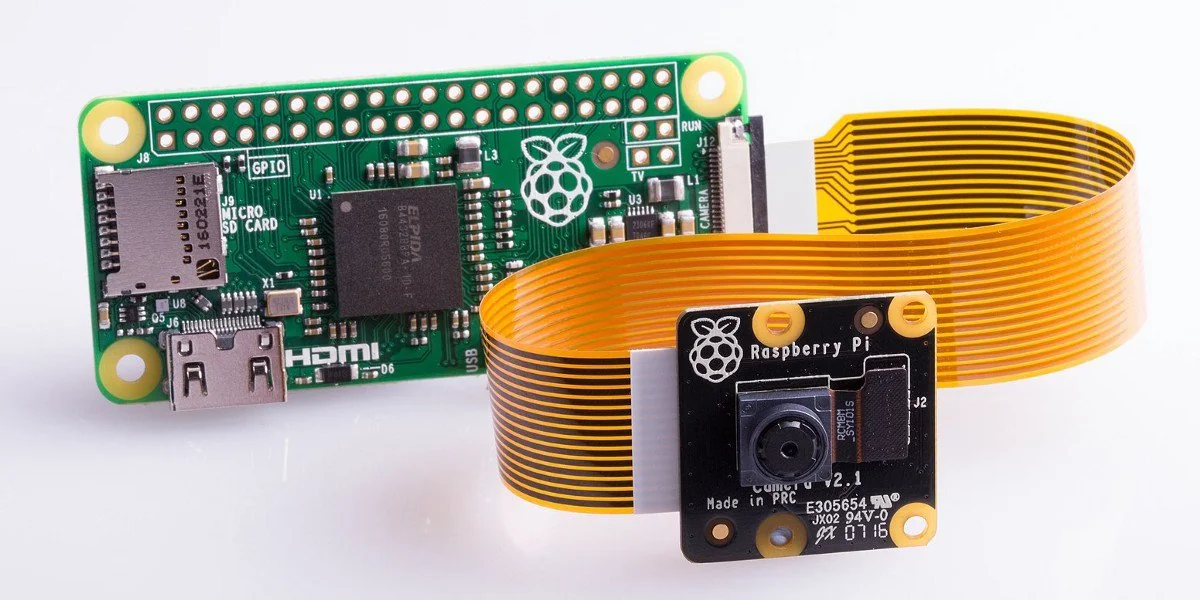
How to Make a Surveillance Camera with Raspberry Pi?
Global electronic component supplier AMPHEO PTY LTD: Rich inventory for one-stop shopping. Inquire easily, and receive fast, customized solutions and quotes.
Turn your Raspberry Pi into a motion-activated security camera with live streaming, recording, and cloud backup. Here’s a step-by-step guide:

🔧 Required Hardware
-
Raspberry Pi (Pi 4/5 recommended for best performance)
-
Raspberry Pi Camera Module (or USB webcam)
-
MicroSD Card (16GB+ recommended)
-
Power Supply (Official Pi PSU recommended)
-
Optional:
-
PIR motion sensor (for hardware motion detection)
-
Infrared (IR) camera for night vision
-
Enclosure (for weatherproofing)
-
📌 Step 1: Install Raspberry Pi OS
-
Download Raspberry Pi Imager.
-
Flash Raspberry Pi OS (64-bit Lite recommended) to the SD card.
-
Enable SSH by creating an empty
sshfile in thebootpartition. -
Boot the Pi and connect via SSH (
ssh pi@<IP>).
📸 Step 2: Set Up the Camera
🔹 For Official Raspberry Pi Camera Module
-
Enable the camera:
sudo raspi-config→ Interface Options → Camera → Enable → Reboot.
-
Test the camera:
libcamera-hello -t 0 # Preview camera feed
🔹 For USB Webcam
-
Check if detected:
lsusb
-
Install
fswebcamfor testing:sudo apt install fswebcam fswebcam test.jpg # Capture a test image
🎥 Step 3: Install Motion Detection Software
We’ll use MotionEyeOS (easy) or Motion (more customizable).
Option 1: MotionEyeOS (Simplest Setup)
-
Download MotionEyeOS for Raspberry Pi.
-
Flash it to the SD card using Balena Etcher.
-
Boot the Pi → Access via
http://<Pi_IP>(default login:adminwith no password). -
Configure:
-
Add camera (Pi Camera or USB)
-
Set motion detection sensitivity
-
Enable recording & alerts
-
Option 2: Motion (Advanced Setup)
-
Install Motion:
sudo apt install motion
-
Edit config:
sudo nano /etc/motion/motion.conf
-
Enable
daemon = on -
Set
stream_port = 8081 -
Adjust
thresholdfor motion sensitivity
-
-
Start Motion:
sudo systemctl start motion -
Access stream at
http://<Pi_IP>:8081.
🔔 Step 4: Enable Notifications (Optional)
📧 Email Alerts (MotionEyeOS or Motion)
-
In MotionEyeOS Web UI:
-
Go to Notifications → SMTP Email
-
Enter Gmail (or SMTP) details
-
-
For Motion (Manual Setup):
sudo apt install ssmtp mailutils
sudo nano /etc/ssmtp/ssmtp.conf
Add:
[email protected]
mailhub=smtp.gmail.com:587
[email protected]
AuthPass=your_app_password  # Use Gmail App Password
UseSTARTTLS=YES
Then edit
/etc/motion/motion.conf:on_motion_detected echo "Motion detected!" | mail -s "Alert" [email protected]
📱 Telegram Alerts
-
Create a Telegram Bot via BotFather.
-
Install
curl:sudo apt install curl
-
Add to
motion.conf:on_motion_detected curl -s "https://api.telegram.org/bot<TOKEN>/sendMessage?chat_id=<CHAT_ID>&text=Motion%20Detected!"
☁️ Step 5: Cloud Backup (Optional)
📤 Upload to Google Drive
-
Install
rclone:sudo apt install rclone rclone config
-
Set up Google Drive sync.
-
Add a cron job to upload recordings:
crontab -e
Add:
* * * * * rclone copy /var/lib/motion/ remote:PiSurveillance
🔋 Step 6: Run on Startup (Auto-Launch)
For MotionEyeOS:
Already runs automatically.
For Motion:
sudo systemctl enable motion
🎉 Final Setup
-
Access Live Feed:
http://<Pi_IP>(MotionEyeOS) orhttp://<Pi_IP>:8081(Motion) -
Recordings Stored In:
/var/lib/motion(Motion) or/data/output(MotionEyeOS) -
Extend Functionality:
-
Add infrared LEDs for night vision
-
Use OpenCV for facial recognition
-
📌 Summary: Best Setup?
| Method | Ease | Features |
|---|---|---|
| MotionEyeOS | ⭐⭐⭐⭐⭐ | Simple UI, Email Alerts |
| Motion | ⭐⭐⭐ | More customizable |
